Getting Arduino to say 'hello' world.
Disclaimer. There are generic tutorials from the internet and beggining Arudino books, all of the images are my own.
- Install the Arduino software
- Example 01: Blinking LED . Its like Hello World for Arduino
- Example 02: Using a Pushbutton to control the LED.
- Example 03: Using PWN to control the LED.
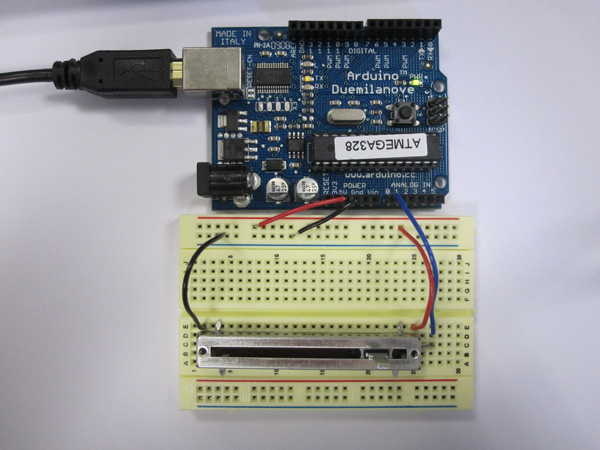
- Example 04: Using an Analog Input.
- Example 05: Sending Stuff to the serial port.
Install Arduino Software
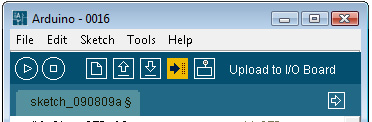
- Download latest software from Arduino.cc. From http://arduino.cc/en/Main/Software . Arduino 0016
- Install onto your computer. I keep mine in the C:/ Directory.
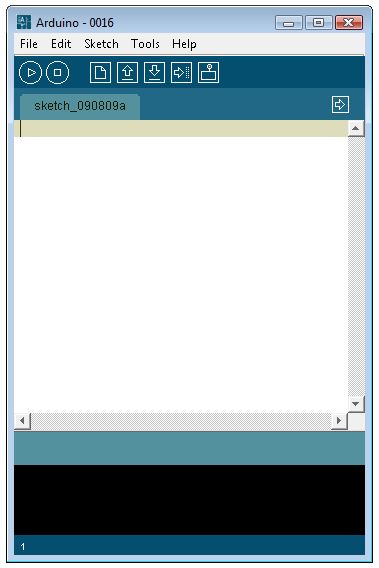
- Run Arduino.exe from C:/Arudino/arduino-0016/arduino.exe
- The loaded Arduino Enviroment.
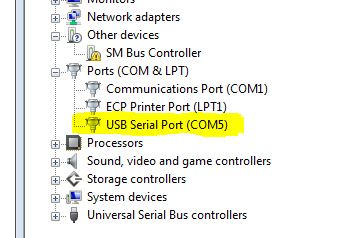
- Plug in your Arduino.
- Find the COM Port of the Arduino.
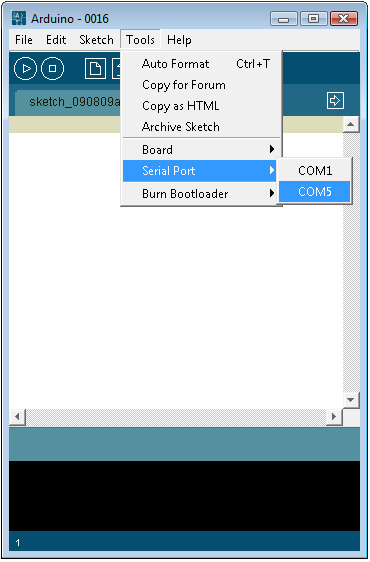
- Setting the COM port in Arudino Programe
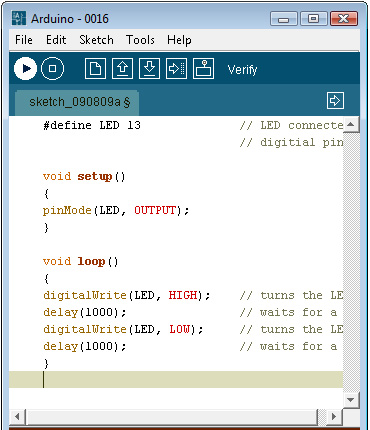
Example 01: Blinking LED . Its the 'Hello World' of Arduino.
- Type out the code.
#define LED 13 // LED connected to // digitial pin 13. void setup() { pinMode(LED, OUTPUT); } void loop() { digitalWrite(LED, HIGH); // turns the LED on delay(1000); // waits for a second digitalWrite(LED, LOW); // turns the LED off delay(1000); // waits for a second } - Verify the code.
- Upload Code.
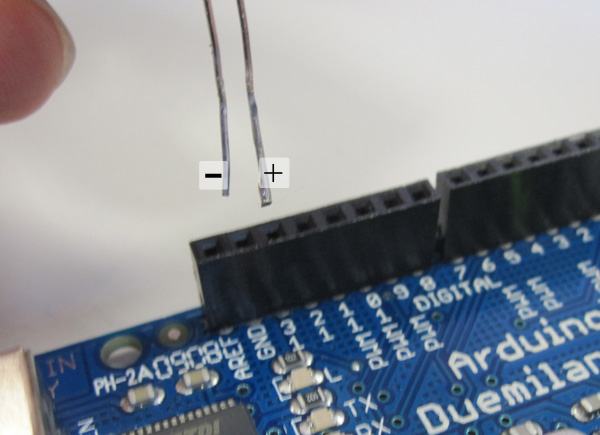
- Insert LED
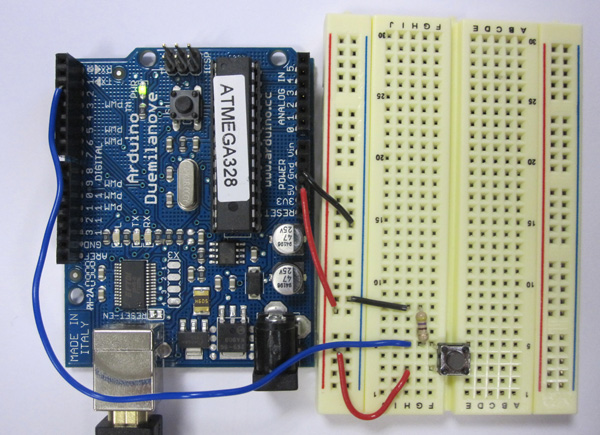
Example 02: Using a Pushbutton to Control the LED.
    #define LED 13		// LED connected to
    				// digitial pin 13.
    #define BUTTON 2 	// in input for the button
    int val = 0;	//this value store the button state


    void setup() {
    pinMode(LED, OUTPUT);
    pinMode(BUTTON, INPUT);
    }

    void loop() {
    val = digitalRead(BUTTON);	//Reads the buttons and stores it.

    // Uses an IF statement to see if BUTTON is pressed.
    if (val == HIGH ) {
    	digitalWrite(LED, HIGH); //turn LED On.
        } else {
        digitalWrite(LED, LOW);
        }
    }
    }
Example 2.
    #define LED 13		// LED connected to
    				// digitial pin 13.
    #define BUTTON 2 	// in input for the button
    int val = 0;	//this value store the button state
    int state = 0;	// 0 = LED off while 1 = LED on.


    void setup(){
    pinMode(LED, OUTPUT);
    pinMode(BUTTON, INPUT);
    }

    void loop(){
    val = digitalRead(BUTTON);	//Reads the buttons and stores it.

    // Uses an IF statement to see if BUTTON is pressed.
    // and changes it state
    if (val == HIGH {
    	state = 1 - state;
    }

    if (state == 1) {
    	digitalWrite(LED, HIGH);	//Turn LED on.
        } else {
        digitalWrite(LED, LOW);
        }
   }
Example 3. Turn on LED when the button is pressed and keep it on after it is released. Including simple de-bouncing.
    #define LED 13		// LED connected to
    				// digitial pin 13.
    #define BUTTON 2 	// in input for the button
    int val = 0;		//this value store the button state
	  int state = 0;	// 0 = LED off while 1 = LED on.
    int old_val = 0;	// stores the previous val.

    void setup(){
    pinMode(LED, OUTPUT);
    pinMode(BUTTON, INPUT);
    }

    void loop() {
    val = digitalRead(BUTTON);	//Reads the buttons and stores it.

    // Uses an IF statement to see if BUTTON is pressed.
    // and changes it state
    if ((val == HIGH ) && (old_val == LOw)) {
    	state = 1 - state;
		delay(10);
    }


	old_val = val; // val is old, and stored in the old_val.

    if (state == 1) {
    	digitalWrite(LED, HIGH);	//Turn LED on.
        } else {
        digitalWrite(LED, LOW);
        }
   }
Example 03:Using PWN to control the LED.
An example that fades an LED in and out. Looks like Apple?
    #define LED 9		// LED connected to
    					// digitial pin 9.
    int i = 0;		//this value store the button state


    void setup(){
    pinMode(LED, OUTPUT);
    }

    void loop(){
   	for (i = 0; i < 255; i++) { //loops from 0 to 254. Fades Up.
    	analogWrite(LED, i);
        delay(10);	//Wait 10ms because analogWrite would otherwise
        				// be instantaneous.
		}

		for (i = 255; i > 0; i--) { //loops from 255 to 1. Fade Down.
		analogWrite(LED, i);	// Gives the LED power.
		delay(10);
		}
   }
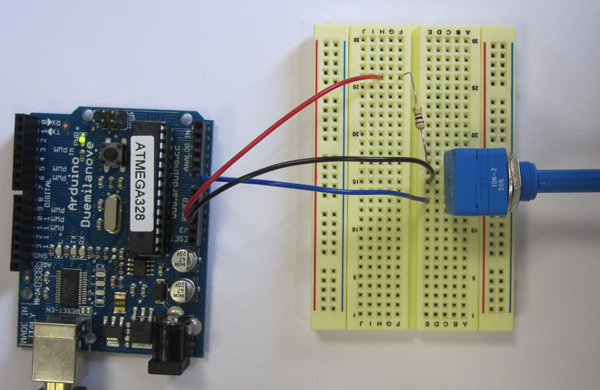
Example 04: Using an Analog Input. Using an LDR
The more resistance the longer the light will come on.
 /*
   Analog Input
  Demonstrates analog input by reading an analog sensor on analog pin 0 and
  turning on and off a light emitting diode(LED)  connected to digital pin 13.
  The amount of time the LED will be on and off depends on
  the value obtained by analogRead().

  The circuit:
  * LDR attached to analog input 0


    */
 int sensorPin = 0;    // select the input pin for the potentiometer
 int ledPin = 13;      // select the pin for the LED
 int sensorValue = 0;  // variable to store the value coming from the sensor
 void setup() {
   // declare the ledPin as an OUTPUT:
   pinMode(ledPin, OUTPUT);
 }
 void loop() {
   // read the value from the sensor:
   sensorValue = analogRead(sensorPin);
   // turn the ledPin on
   digitalWrite(ledPin, HIGH);
   // stop the program for  milliseconds:
   delay(sensorValue);
   // turn the ledPin off:
   digitalWrite(ledPin, LOW);
   // stop the program for for  milliseconds:
   delay(sensorValue);
 }
Example 05:Sending data to the serial port.
Example 05: Sending data to the serial port.
Example 04: Using an Analog Input.
    #define SENSOR 1
    int val = 0;


    void setup(){
  	Serial.begin(9600);   //Opens a serial port.
    }

    void loop(){

		val = analogRead(SENSOR);

		Serial.printIn(val);

		delay(100); //Wait 100ms bewteen each send.
   }